

How To Save An Image From Camera Feed On Computer Python
In this blog nosotros explained how a elementary python script can be used to stream the color photographic camera with OpenCV Python.
For more advanced features like support for standard UVC controls and Epitome capture options forth with photographic camera streaming, you lot may refer the post-obit weblog: https://world wide web.east-consystems.com/blog/camera/camera-lath/interface-high-quality-cameras-with-opencv-python/
Open up Estimator Vision (OpenCV) is an open source BSD licensed image processing bundle that contains functions for all type of paradigm processing functionality from bones image decoding, enhancement, colour space conversion, object detection, object tracking and and then on.
This blog is intended to testify how to access and utilize the cameras for OpenCV by using a simple Python script.
See3CAM Cameras
See3CAM is the USB 3.0 camera series from e-con Systems™. These cameras are UVC-compliant that has Plug & Play back up on Windows/Linux which does not require to install boosted device drivers manually.
For this sample application, we are going to apply e-con Systems™ 13MP Auto focus USB 3.0 photographic camera – See3CAM_130. We'll see pace by footstep process on how to access the See3CAM_130 camera from a uncomplicated OpenCV-Python application, which will grab the frame from camera and brandish in the preview window.
Allow us commencement from building the OpenCV and its dependencies in Ubuntu PC.
Exam System:
Host PC: Ubuntu-14.04
OpenCV Version: 3.4.1
Python Version: 2.7
Download OpenCV source
Download the required OpenCV version for Linux from the following command
$ wget https://github.com/opencv/opencv/archive/three.4.1.goose egg
Install Dependencies:
OpenCV requires the following dependencies to work with the USB cameras. Install the dependencies from the following commands:
# libav video input/output evolution libraries
$ sudo apt-get install libavformat-dev libavutil-dev libswscale-dev
# Video4Linux camera development libraries
$ sudo apt-get install libv4l-dev
# OpenGL development libraries (to allow creating graphical windows)
$ sudo apt-get install libglew-dev
# GTK development libraries (to allow creating graphical windows)
$ sudo apt-get install libgtk2.0-dev
# Install the OpenCV python
$ sudo apt-become install python-opencv
Configure OpenCV:
Afterwards installing the dependencies, now we need to build and install OpenCV using the following commands:
$ unzip opencv-three.four.one.zip
$ cd opencv-three.four.one
$ mkdir build && cd build
cmake -D CMAKE_BUILD_TYPE=RELEASE -D WITH_TBB=OFF -D BUILD_TBB=OFF -D WITH_V4L=ON -D WITH_LIBV4L=OFF -D BUILD_TESTS=OFF -D BUILD_PERF_TESTS=OFF ..
Compile and install:
The following command will build and install OpenCV libraries in the location – "/usr/local/lib/"
$ sudo make j4 install
We now have congenital & installed OpenCV in the Ubuntu PC. Allow us expect how to prepare a sample Python application to stream the camera using OpenCV
The following sample OpenCV python code explain how to open the device video node, set the resolution, grab the frame and and then brandish the frame in preview window.
- Import the OpenCV python package
- Open the photographic camera video node to access the See3CAM_130
cap = cv2.VideoCapture(0)
#Check whether user selected camera is opened successfully.
if not (cap.isOpened()):
print("Could non open up video device")
- Set the resolution of the camera by using OpenCV camera control backdrop
cap.set(cv2.cv.CV_CAP_PROP_FRAME_WIDTH, 640)
cap.set(cv2.cv.CV_CAP_PROP_FRAME_HEIGHT, 480)
- Grab the frame continuously from the photographic camera and show it in the preview window using the while loop. Enter 'q' key, to intermission the loop and go out the awarding
# Capture frame-by-frame
ret, frame = cap.read()
# Brandish the resulting frame
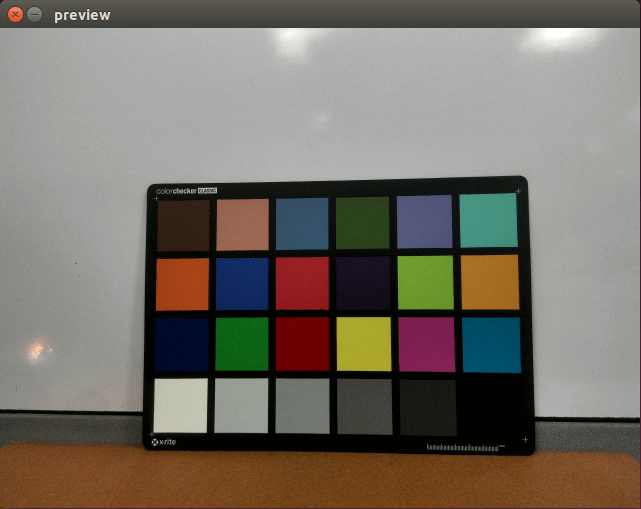
cv2.imshow('preview',frame)
#Waits for a user input to quit the awarding
if cv2.waitKey(1) & 0xFF == ord('q'):
interruption
- Release the camera, then close all of the imshow() windows.
cap.release()
cv2.destroyAllWindows()
Salve the sample code as "camera_stream.py".
# Open the device at the ID 0
cap = cv2.VideoCapture(0)
#Check whether user selected camera is opened successfully.
if not (cap.isOpened()):
print("Could not open video device")
#To set the resolution
cap.set(cv2.cv.CV_CAP_PROP_FRAME_WIDTH, 640)
cap.fix(cv2.cv.CV_CAP_PROP_FRAME_HEIGHT, 480)
while(True):
# Capture frame-by-frame
ret, frame = cap.read()
# Display the resulting frame
cv2.imshow('preview',frame)
#Waits for a user input to quit the application
if cv2.waitKey(1) & 0xFF == ord('q'):
break
# When everything done, release the capture
cap.release()
cv2.destroyAllWindows()
Now compile and run the program:
Past using this uncomplicated python script, we shall be able to access and use the cameras for OpenCV.
Source: https://www.e-consystems.com/blog/camera/technology/how-to-access-cameras-using-opencv-with-python/
Posted by: casianolous1944.blogspot.com
0 Response to "How To Save An Image From Camera Feed On Computer Python"
Post a Comment